현재 본인이 보유하고 있는 라즈베리파이는 2개이다.
- Raspberry Pi 1 Model B - 공식 사이트에 링크도 없음 ㅜㅜ
- Raspberry Pi 2 Model B - https://www.raspberrypi.org/products/raspberry-pi-2-model-b/
현재 가장 최신이 버젼 4 인 것을 보면 새월이 참 많이 흘렀다 싶다. 많은 부푼 희망을 가지고 구매를 했지만, 실제로 무엇인가를 만들어 본 것은 없다. 그냥 왠지 예전에 리눅스가 처음 나왔을 때, 모든 역경을 딛고 설치를 완료하고 “머하지?”라고 했던 것과 비슷한 기분이었던 것 같다.
단순한 Web Server와 Splite를 구동한 것이 필요해서 설치를 진행해 볼 생각이다.
버젼 3 까지만 하더라도 다른 툴을 이용해서 이미지를 SD card에 복사를 했다면, 지금은 전용 프로그램을 공식사이트에서 배포를 하기 시작했다. 좋은 세상~
https://www.raspberrypi.org/downloads/
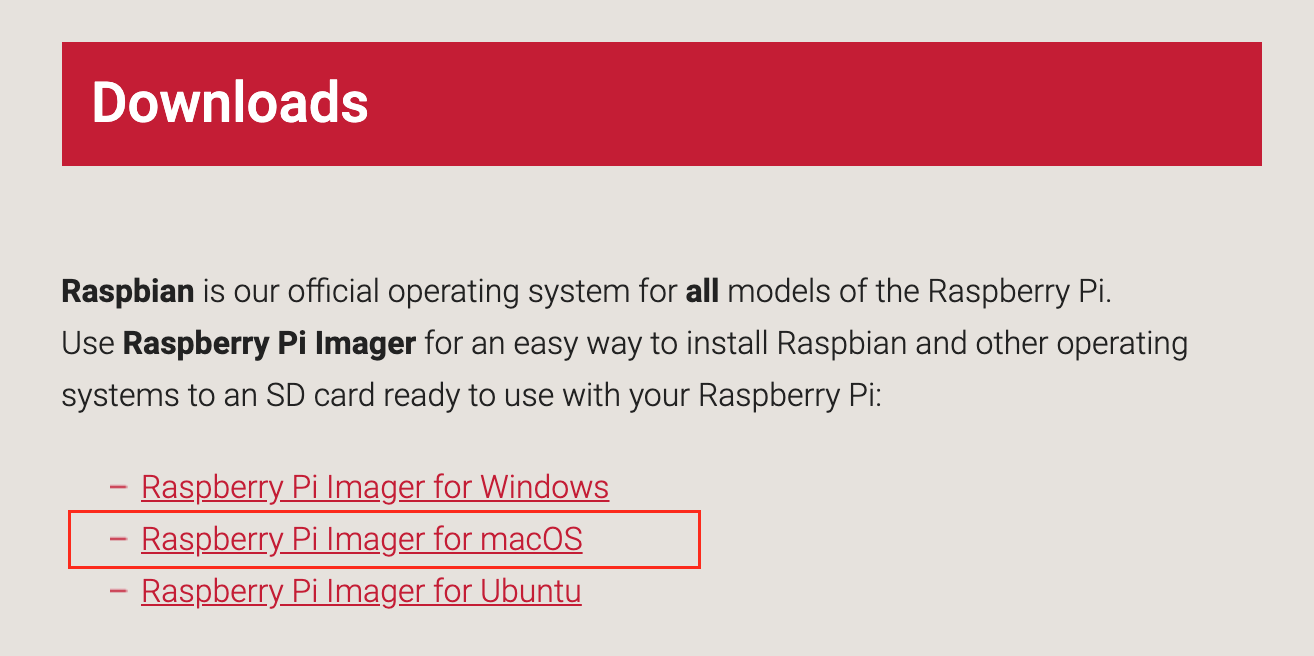
MacOS를 사용하고 있어서 두번째 것을 다운 받으면 “imager.dmg” 파일이 생성된다. 이것을 설치하면

프로그램이 설치가 완료된다.
SD card를 넣고 “디스크 유틸리티”에서 인식되는 것을 확인한 후에 프로그램을 실행하면 된다.
그 다음은 간단하다.
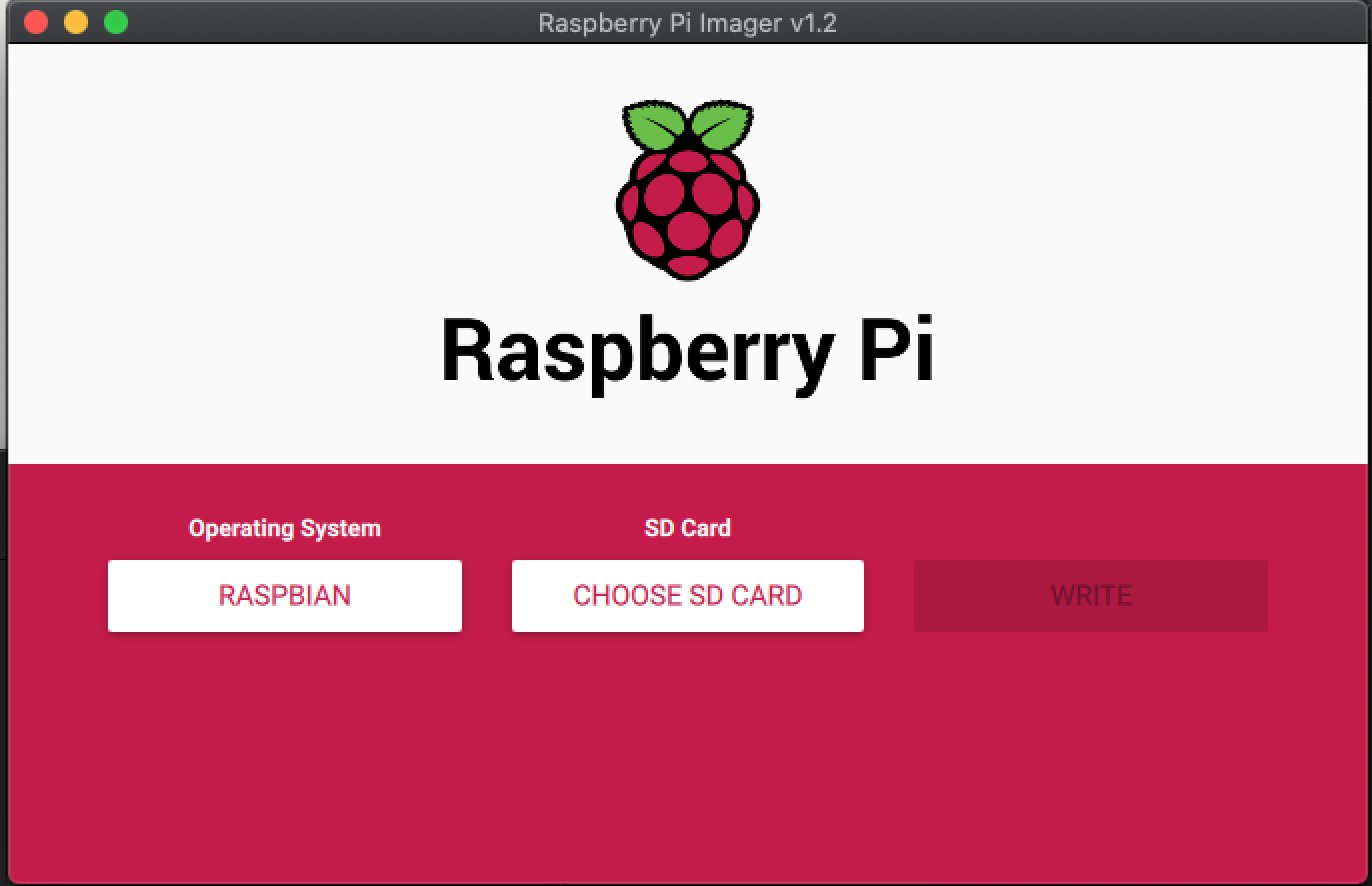
설치될 OS선택하고, SD Card 선택하고, Write를 누르면 진행이 된다. 느린 SD카드는 그 만큼 시간이 오래 걸린다. 확인(Verify)과정이 있어서 시간이 더 걸리는데, 믿는 구석이 있다면 취소도 가능하지만 난 하지 않았다 ^^;
HDMI 모니터와 USB 키보드 & 마우스를 연결한 후에 MicroUSB 전원을 연결하면 부팅하고 설치를 시작한다.
설치가 완료되면 UI 화면이 나오니 설정을 하면 된다.
괜시리 한글을 먼저 설정하지 마라. 전용 프로그램을 설치하기 전까지는 다 깨져서 설정하기가 쉽지 않다. 그냥 영어로 네트워크 설정 등등을 다 완료한 후에 한글 설정하는 것을 추천한다.
나는 공식사이트 링크도 사라진 Raspberry Pi 1 Model B 가지고 진행을 해서 Console mode로 설정을 하도록 했다. SSH는 필수. 나머지는 웹서버로만 쓸 예정이라서 다 Disable했다.
네트워크 설정이 좀 독특했는데,
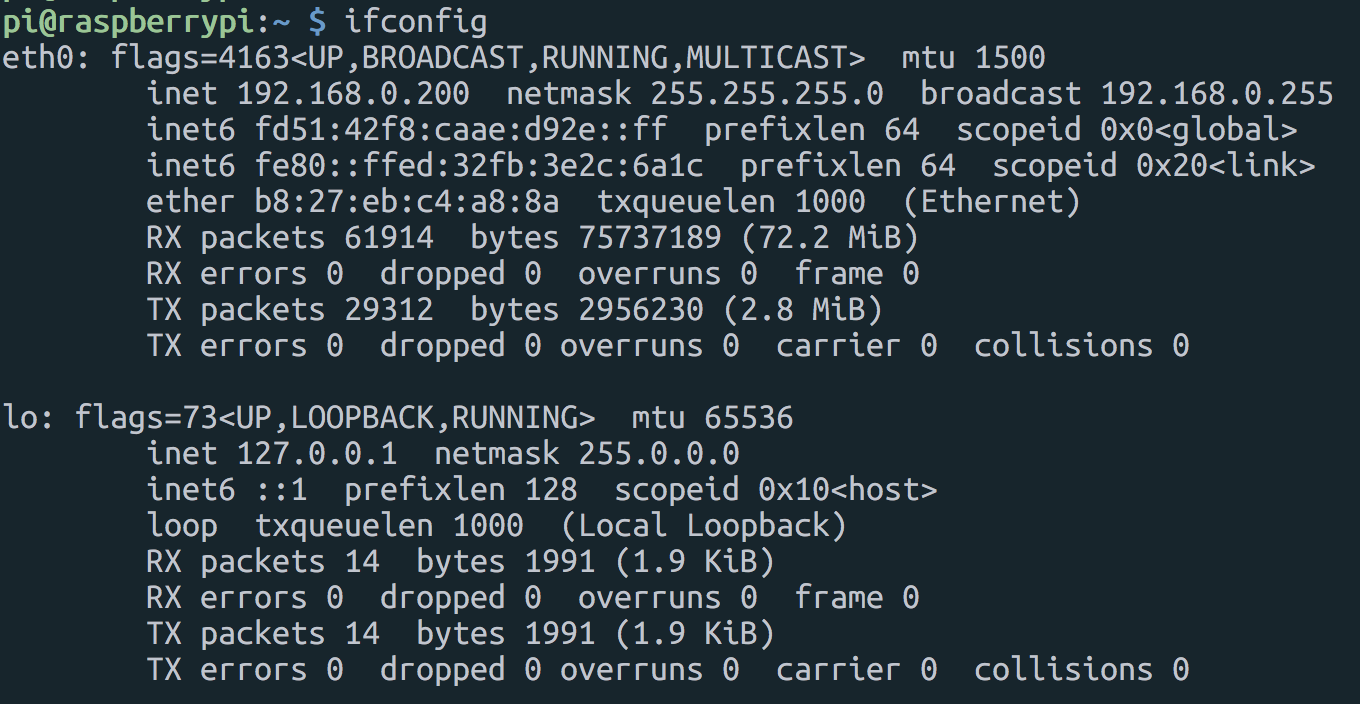
설정이 완료된 모습이다. ifconfig는 아래들이 쓰는 거고 요즘 친구들은 ip 를 쓴다고 하던데…
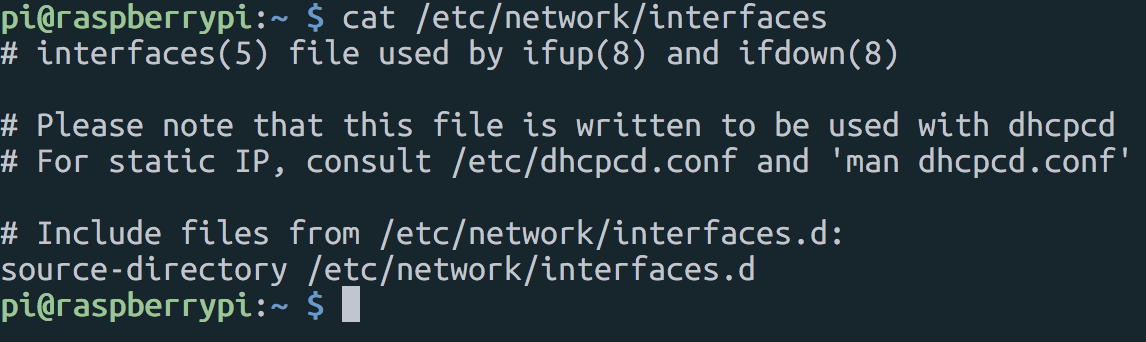
알던 것과 설정하는 곳이 완전히 다르네. 알려 주는대로 /etc/dhcpcd.conf 수정해 보도록 하자.
$sudo vi /etc/dhcpcd.conf
# A sample configuration for dhcpcd.
# See dhcpcd.conf(5) for details.

# Allow users of this group to interact with dhcpcd via the control socket.
#controlgroup wheel

# Inform the DHCP server of our hostname for DDNS.
hostname rasp1-b

# Use the hardware address of the interface for the Client ID.
clientid
# or
# Use the same DUID + IAID as set in DHCPv6 for DHCPv4 ClientID as per RFC4361.
# Some non-RFC compliant DHCP servers do not reply with this set.
# In this case, comment out duid and enable clientid above.
#duid

# Persist interface configuration when dhcpcd exits.
persistent

# Rapid commit support.
# Safe to enable by default because it requires the equivalent option set
# on the server to actually work.
option rapid_commit

# A list of options to request from the DHCP server.
option domain_name_servers, domain_name, domain_search, host_name
option classless_static_routes
# Respect the network MTU. This is applied to DHCP routes.
option interface_mtu

# Most distributions have NTP support.
#option ntp_servers

# A ServerID is required by RFC2131.
require dhcp_server_identifier

# Generate SLAAC address using the Hardware Address of the interface
#slaac hwaddr
# OR generate Stable Private IPv6 Addresses based from the DUID
slaac private

# Example static IP configuration:
interface eth0
static ip_address=192.168.0.200/24
static ip6_address=fd51:42f8:caae:d92e::ff/64
static routers=192.168.0.1
static domain_name_servers=168.126.63.1 8.8.8.8 fd51:42f8:caae:d92e::1

# It is possible to fall back to a static IP if DHCP fails:
# define static profile
#profile static_eth0
#static ip_address=192.168.1.23/24
#static routers=192.168.1.1
#static domain_name_servers=192.168.1.1

# fallback to static profile on eth0
#interface eth0
#fallback static_eth0
서버로 설정을 할꺼라서 고정 IP로 설정을 했다. 주석되어 있는 부분을 풀고 내부 IP로 설정했다.
SSH 서버로 잘 작동하고
$sudo apt update
$sudo apt upgrade
까지 완료!
이제 다음은…